


As the sun sets behind the trees, casting a warm glow over your cozy cottage, you can’t help but admire the rustic charm of a cedar shake roof. If you’re considering adding this timeless touch to your home, look no further. In this guide, we’ll walk you through the process of installing a cedar shake roof, from selecting the perfect materials to completing the finishing touches. So grab your hammer and nails, and let’s get started on transforming your roof into a work of art.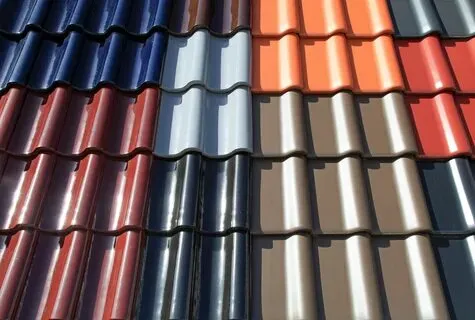
Choosing the Right Materials for Cedar Shake Roofs
When it comes to , there are several factors to consider in order to ensure durability and longevity. One of the most important factors to consider is the type of cedar wood used for the shakes. Cedar shakes can be made from either red cedar or white cedar, each with its own unique characteristics. Red cedar is known for its natural beauty, rich color, and resistance to decay, while white cedar is lighter in weight and has a tighter grain pattern.
Another important consideration when selecting materials for cedar shake roofs is the grade of the shakes. Cedar shakes are available in different grades, ranging from clear grade which is free of knots and defects, to utility grade which may contain knots and imperfections. Choosing the right grade of cedar shakes will depend on your budget and desired aesthetic. Additionally, it’s important to consider the thickness of the shakes, with thicker shakes offering greater durability and longevity. By carefully considering these factors, you can ensure that you choose the right materials for your cedar shake roof that will stand the test of time.
Preparing the Roof Surface for Installation
Before you can begin installing your cedar shake roof, it’s important to properly prepare the surface to ensure a secure and long-lasting installation. Here are some key steps to follow:
- Remove all existing roofing materials, including old shingles, felt paper, and any loose debris.
- Inspect the roof for any damage or rot and make necessary repairs before continuing.
- Clean the surface thoroughly to remove dirt, dust, and any other contaminants that could interfere with the installation.
Once the surface is clean and prepped, you’re ready to move on to the next steps in the installation process. Taking the time to properly prepare the roof surface will help ensure a successful and durable cedar shake roof.

Installing Cedar Shake Shingles: Step-by-Step Guide
If you want to give your home a rustic and charming look, installing cedar shake shingles is a great option. Follow this step-by-step guide to ensure a successful installation process.
First, make sure you have all the necessary tools and materials on hand. This includes cedar shake shingles, roofing felt, roofing nails, a hammer, a saw, and a ladder. It’s also important to make sure your roof is clean and free of debris before starting the installation process. Begin by laying down the roofing felt as a base layer for the shingles. Next, starting at the bottom of the roof, attach the cedar shake shingles using roofing nails. Make sure to overlap each shingle for maximum protection against the elements. Continue this process until the entire roof is covered with cedar shake shingles.
Maintaining and Preserving a Cedar Shake Roof
When it comes to , there are a few key steps that homeowners can take to ensure their roof lasts for many years to come. One of the most important aspects of maintaining a cedar shake roof is regular inspections. This involves checking for any signs of damage, such as loose or missing shakes, mold or mildew growth, or rotting wood. By catching these issues early on, homeowners can prevent more serious damage from occurring.
Another important aspect of preserving a cedar shake roof is proper cleaning and treatment. Cedar shake roofs should be cleaned at least once a year to remove dirt, debris, and mold growth. Additionally, treating the roof with a sealant can help protect the wood from moisture and UV damage. By following these maintenance steps, homeowners can ensure that their cedar shake roof remains in top condition for years to come.
Final Thoughts
As you embark on the journey of installing a cedar shake roof, remember that patience, precision, and attention to detail are key. A cedar shake roof not only adds rustic charm and natural beauty to your home, but also provides long-lasting protection against the elements. By following this guide and seeking guidance from professionals when needed, you can ensure a successful installation that will stand the test of time. So go ahead, elevate your home with a cedar shake roof and enjoy the timeless elegance it brings to your abode. Happy roofing!